Setup Kendra Index
In this section we will setup an Amazon Kendra index and configure an S3 bucket as a datasource.
- Login to the AWS Management Console and confirm that you have set the region to be us-east-1
- Search and browse to Amazon Kendra service. Click on Launch Amazon Kendra.
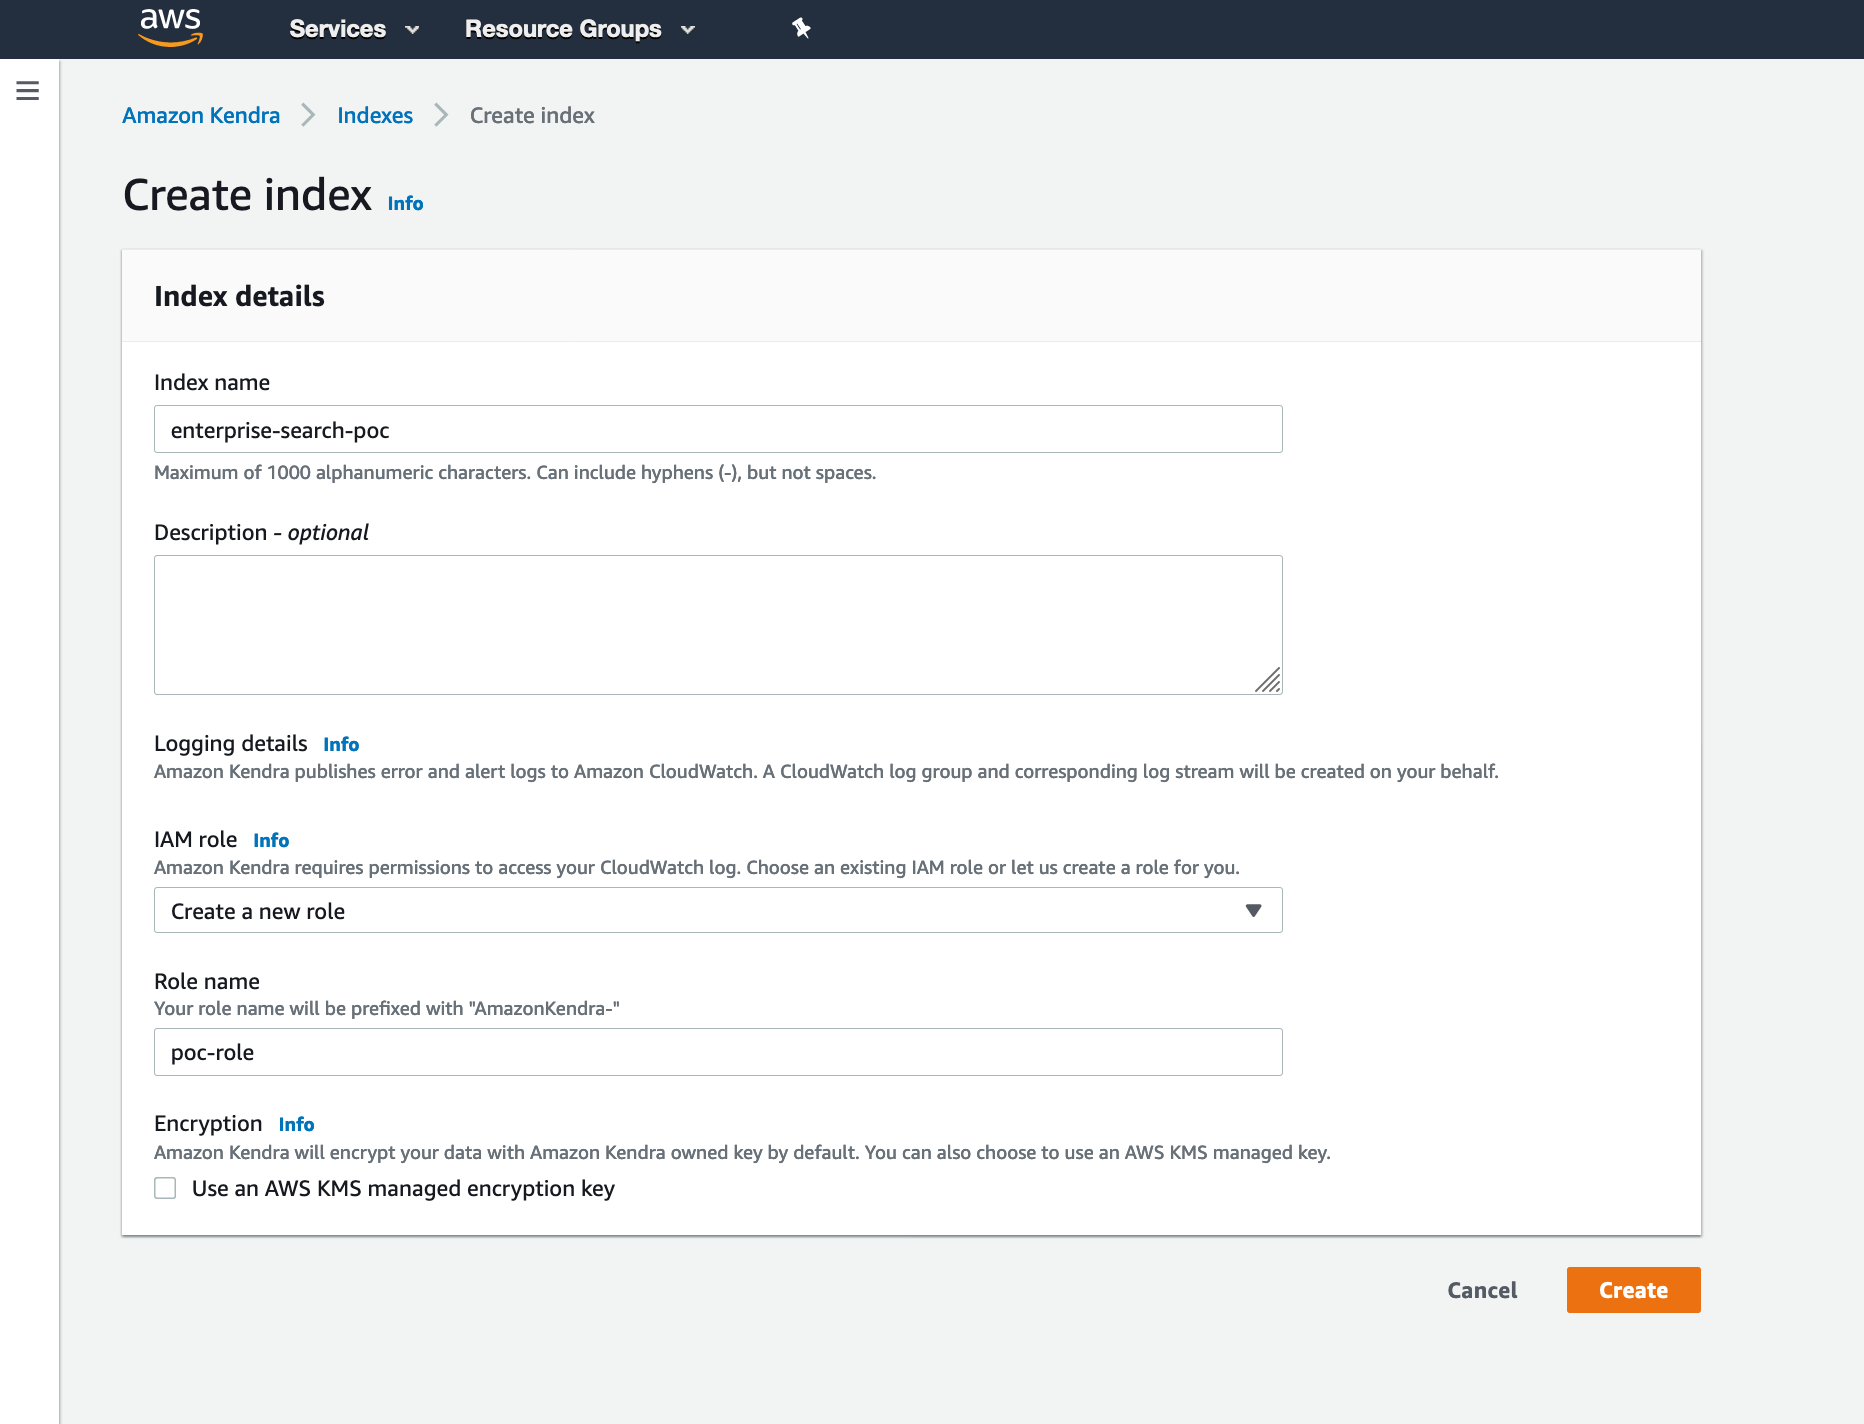
- You will see a screen as below. Type “enterprise-search-poc” as the index name, for IAM role, choose Create a new role and provide a name for the role as “poc-role”. Leave the Use an AWS KMS managed encryption key box unchecked. Click create.
- For more information on IAM Access Roles for Amazon Kendra visit - https://docs.aws.amazon.com/kendra/latest/dg/iam-roles.html
- Note that Kendra index creation can take up to 30 minutes
Create an S3 bucket to be used as a data source
Let’s create an S3 bucket to be used as a data source while we wait for the Kendra index to be created. Browse to S3 from the Management Console and Create a bucket with default settings. You can use kendra-poc-ds-UNIQUE-SUFFIX as a bucket name, where UNIQUE-SUFFIX will need to be replaced appropriately to make sure the uniqueness of the bucket name.
Check Kendra Index
In the AWS Management Console browse back to Amazon Kendra and click on the name of the index you created earlier. You will see a screen as below. Please note and copy-paste the Index ID to note pad. We will need to use it later.

Add data source
- Click on Add data source. In the Select connector type for your data source screen, click the Add connector button under Amazon S3.
- For Data source name give a name e.g. ent-search-poc-ds-001
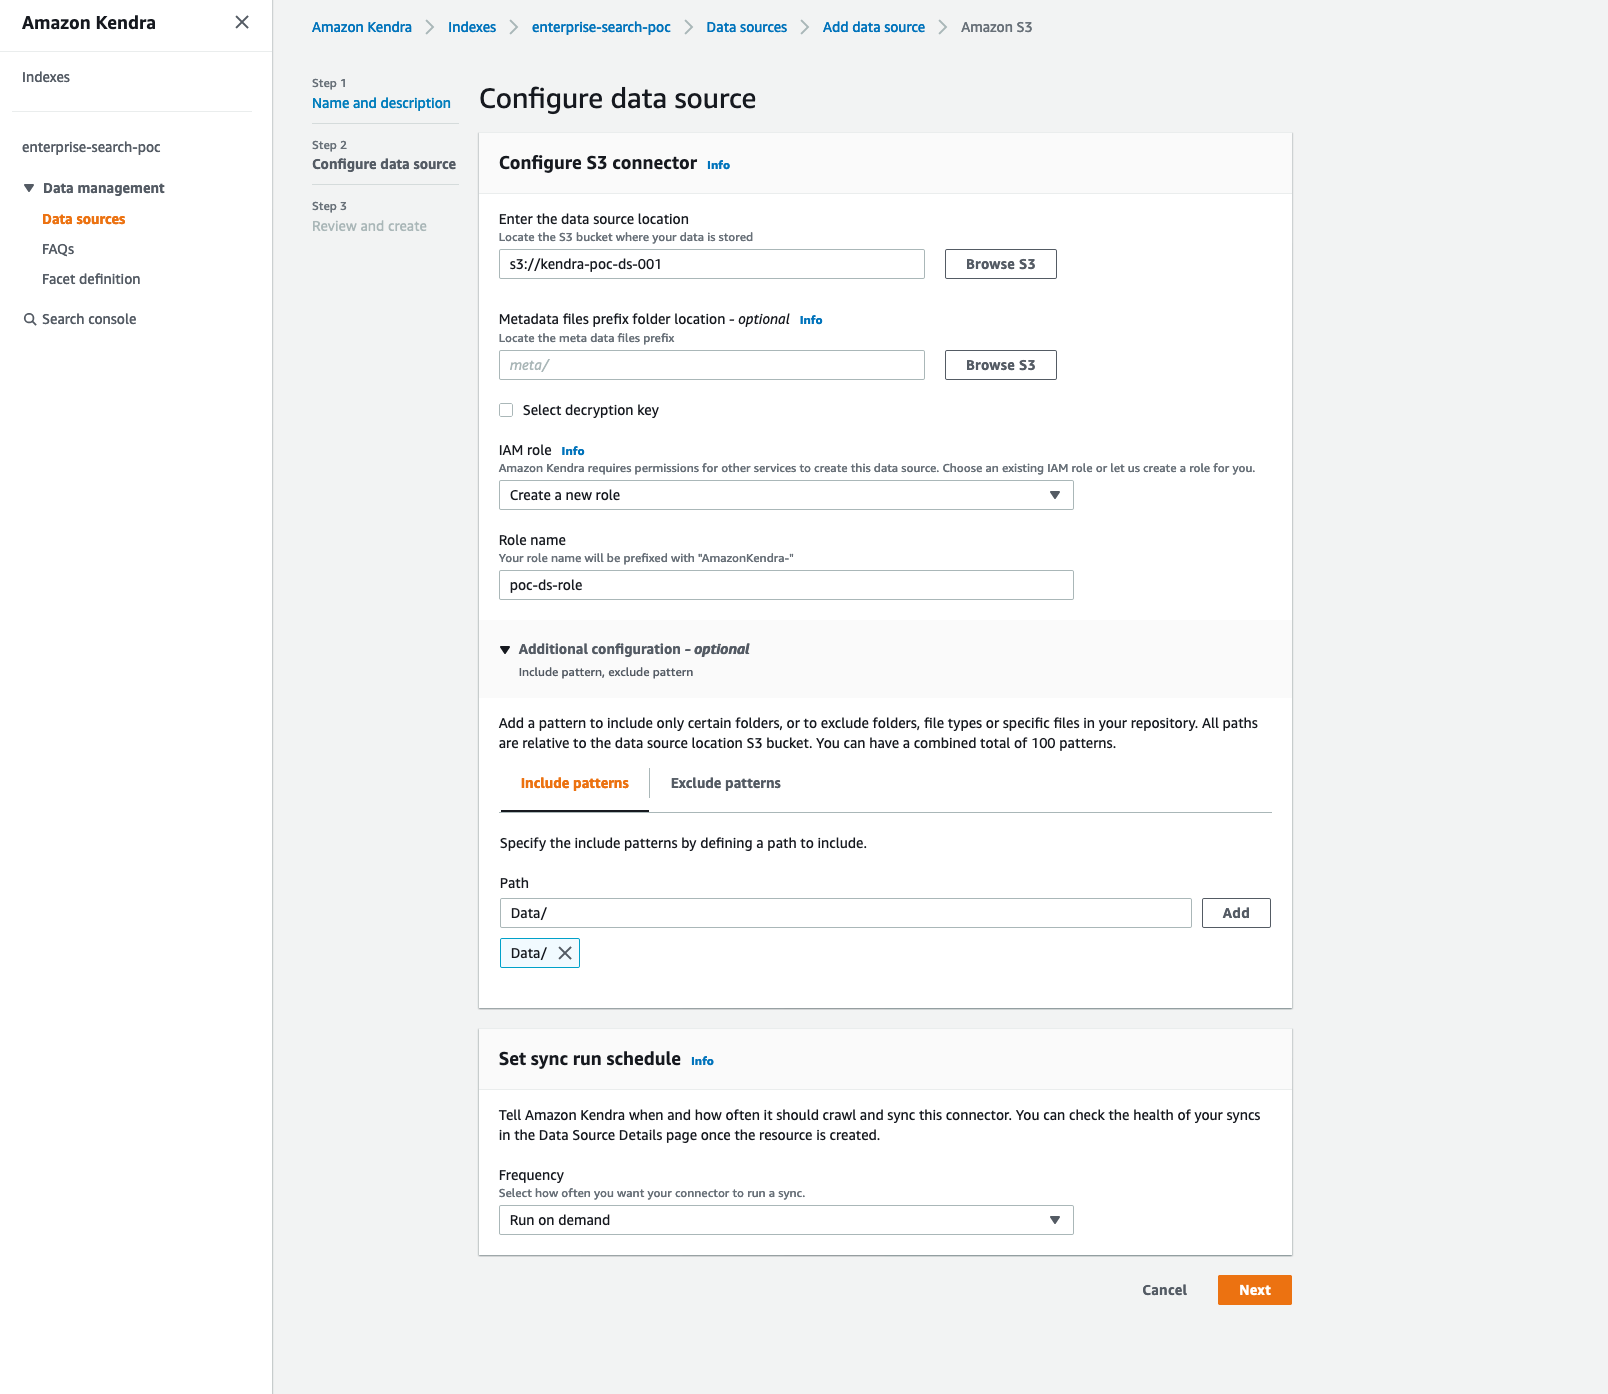
- Configure the data source as shown in the image below. Click on Browse S3 and select the bucket you created earlier. For IAM role select Create a new role. Provide a role name e.g. poc-ds-role. Click on Additional configuration - optional. Add Data/ to include pattern. In Set sync run schedule select Run on demand. Click Next.
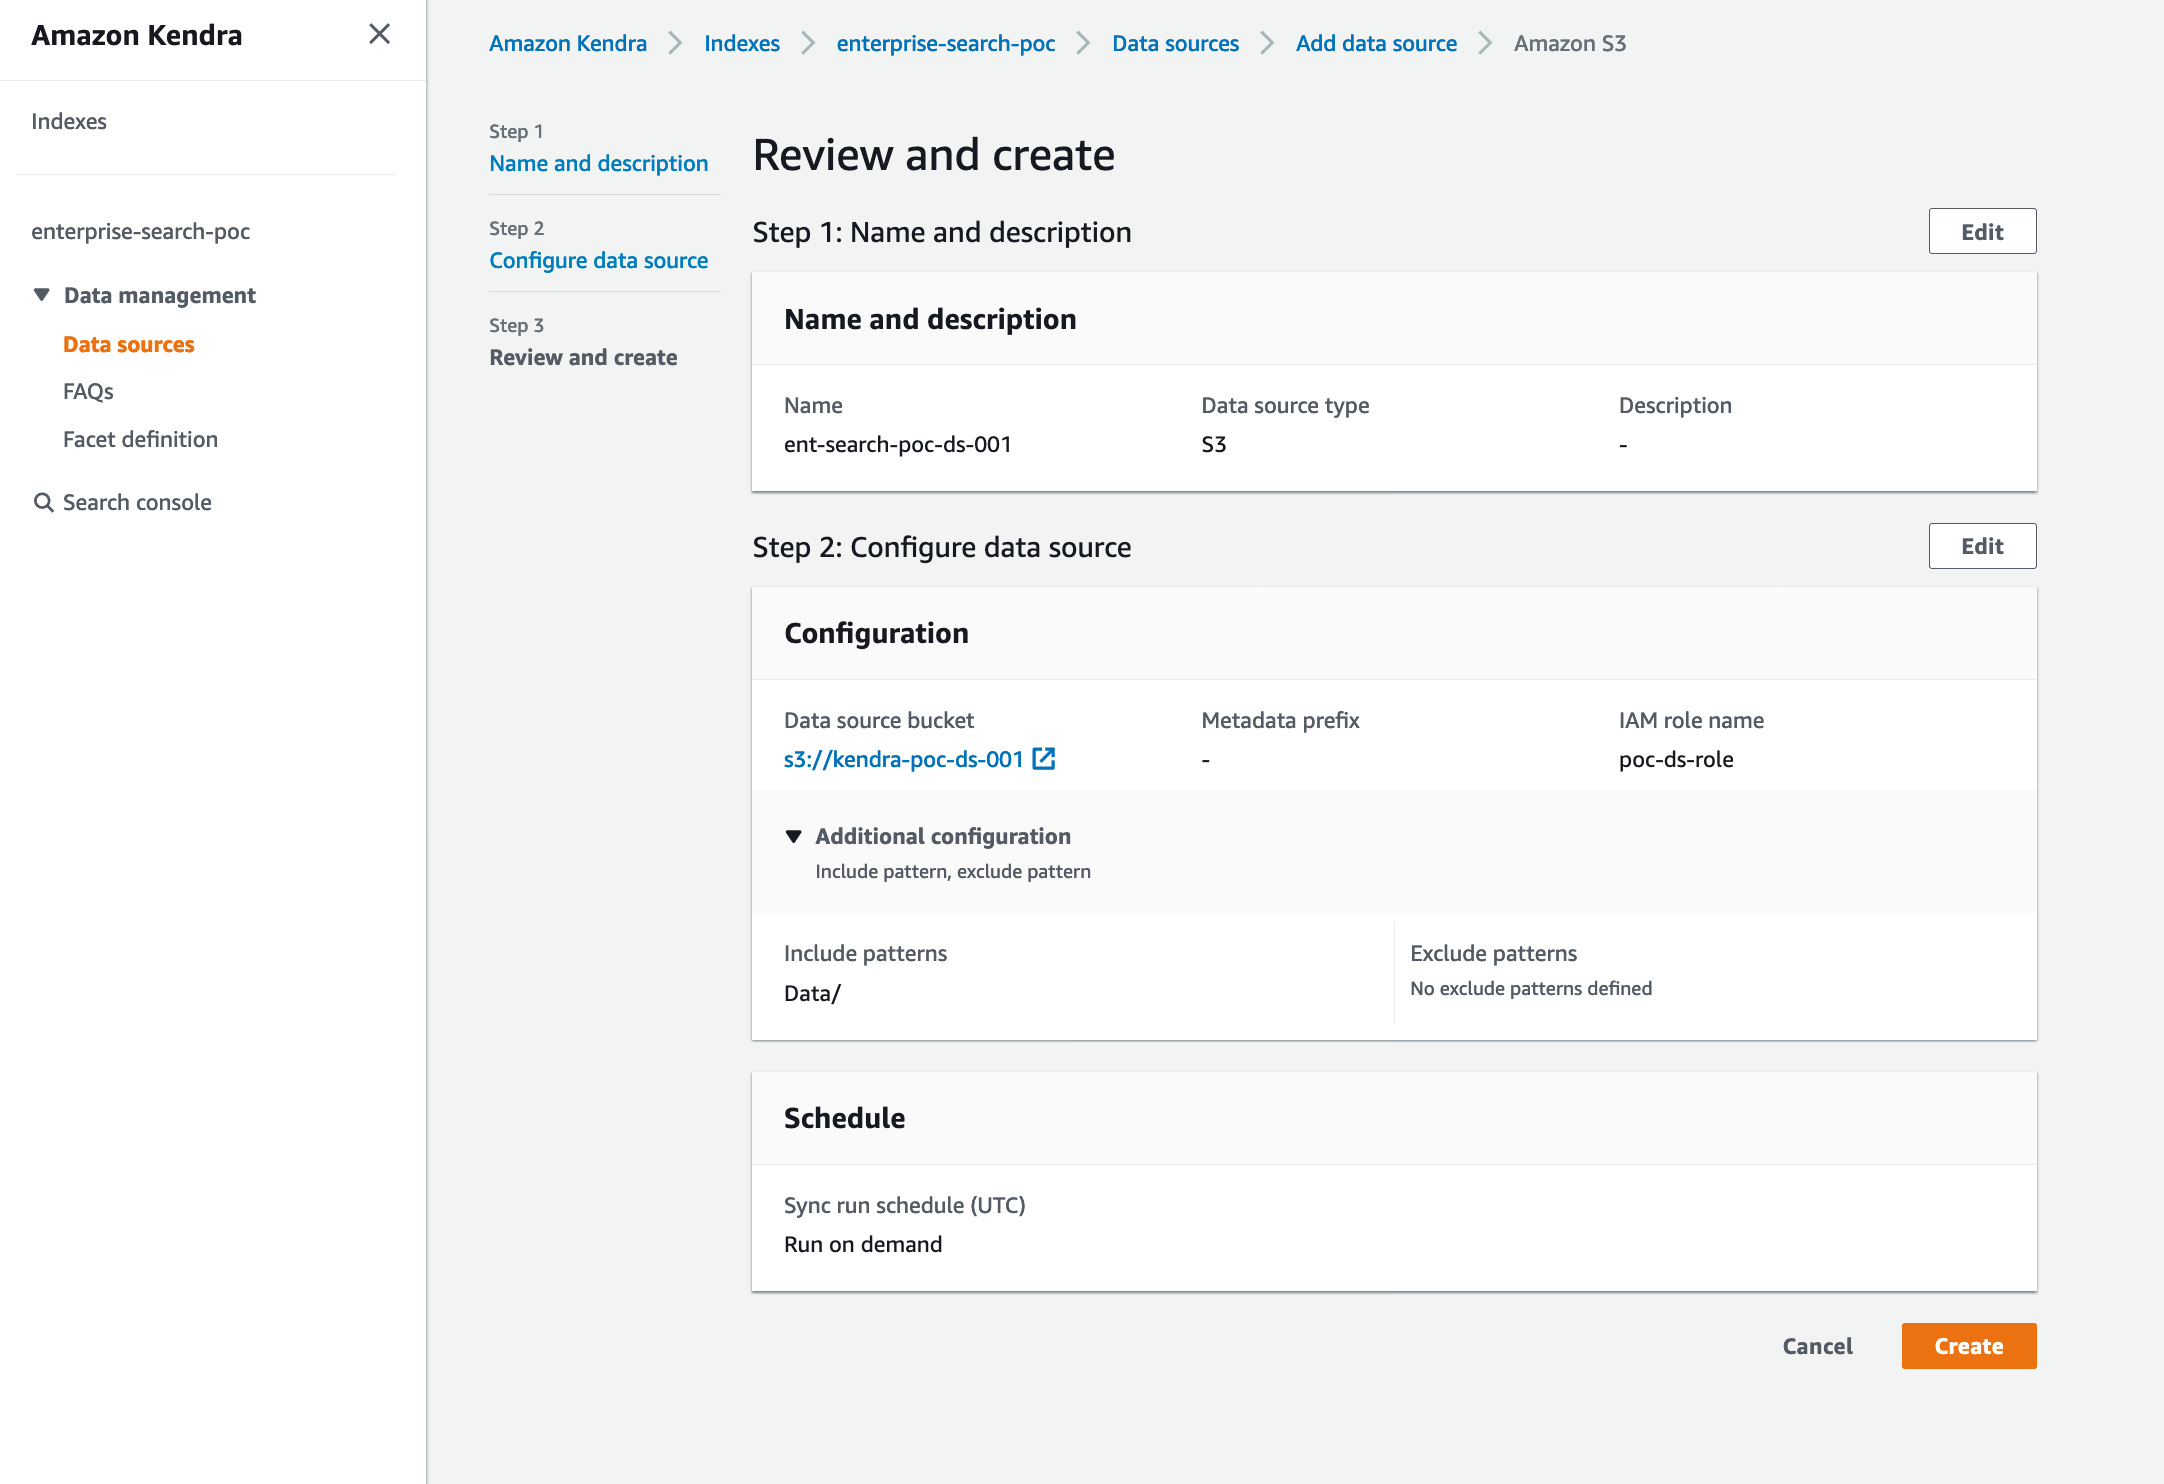
- Check the Review and create screen, confirm the details you configured and press create.
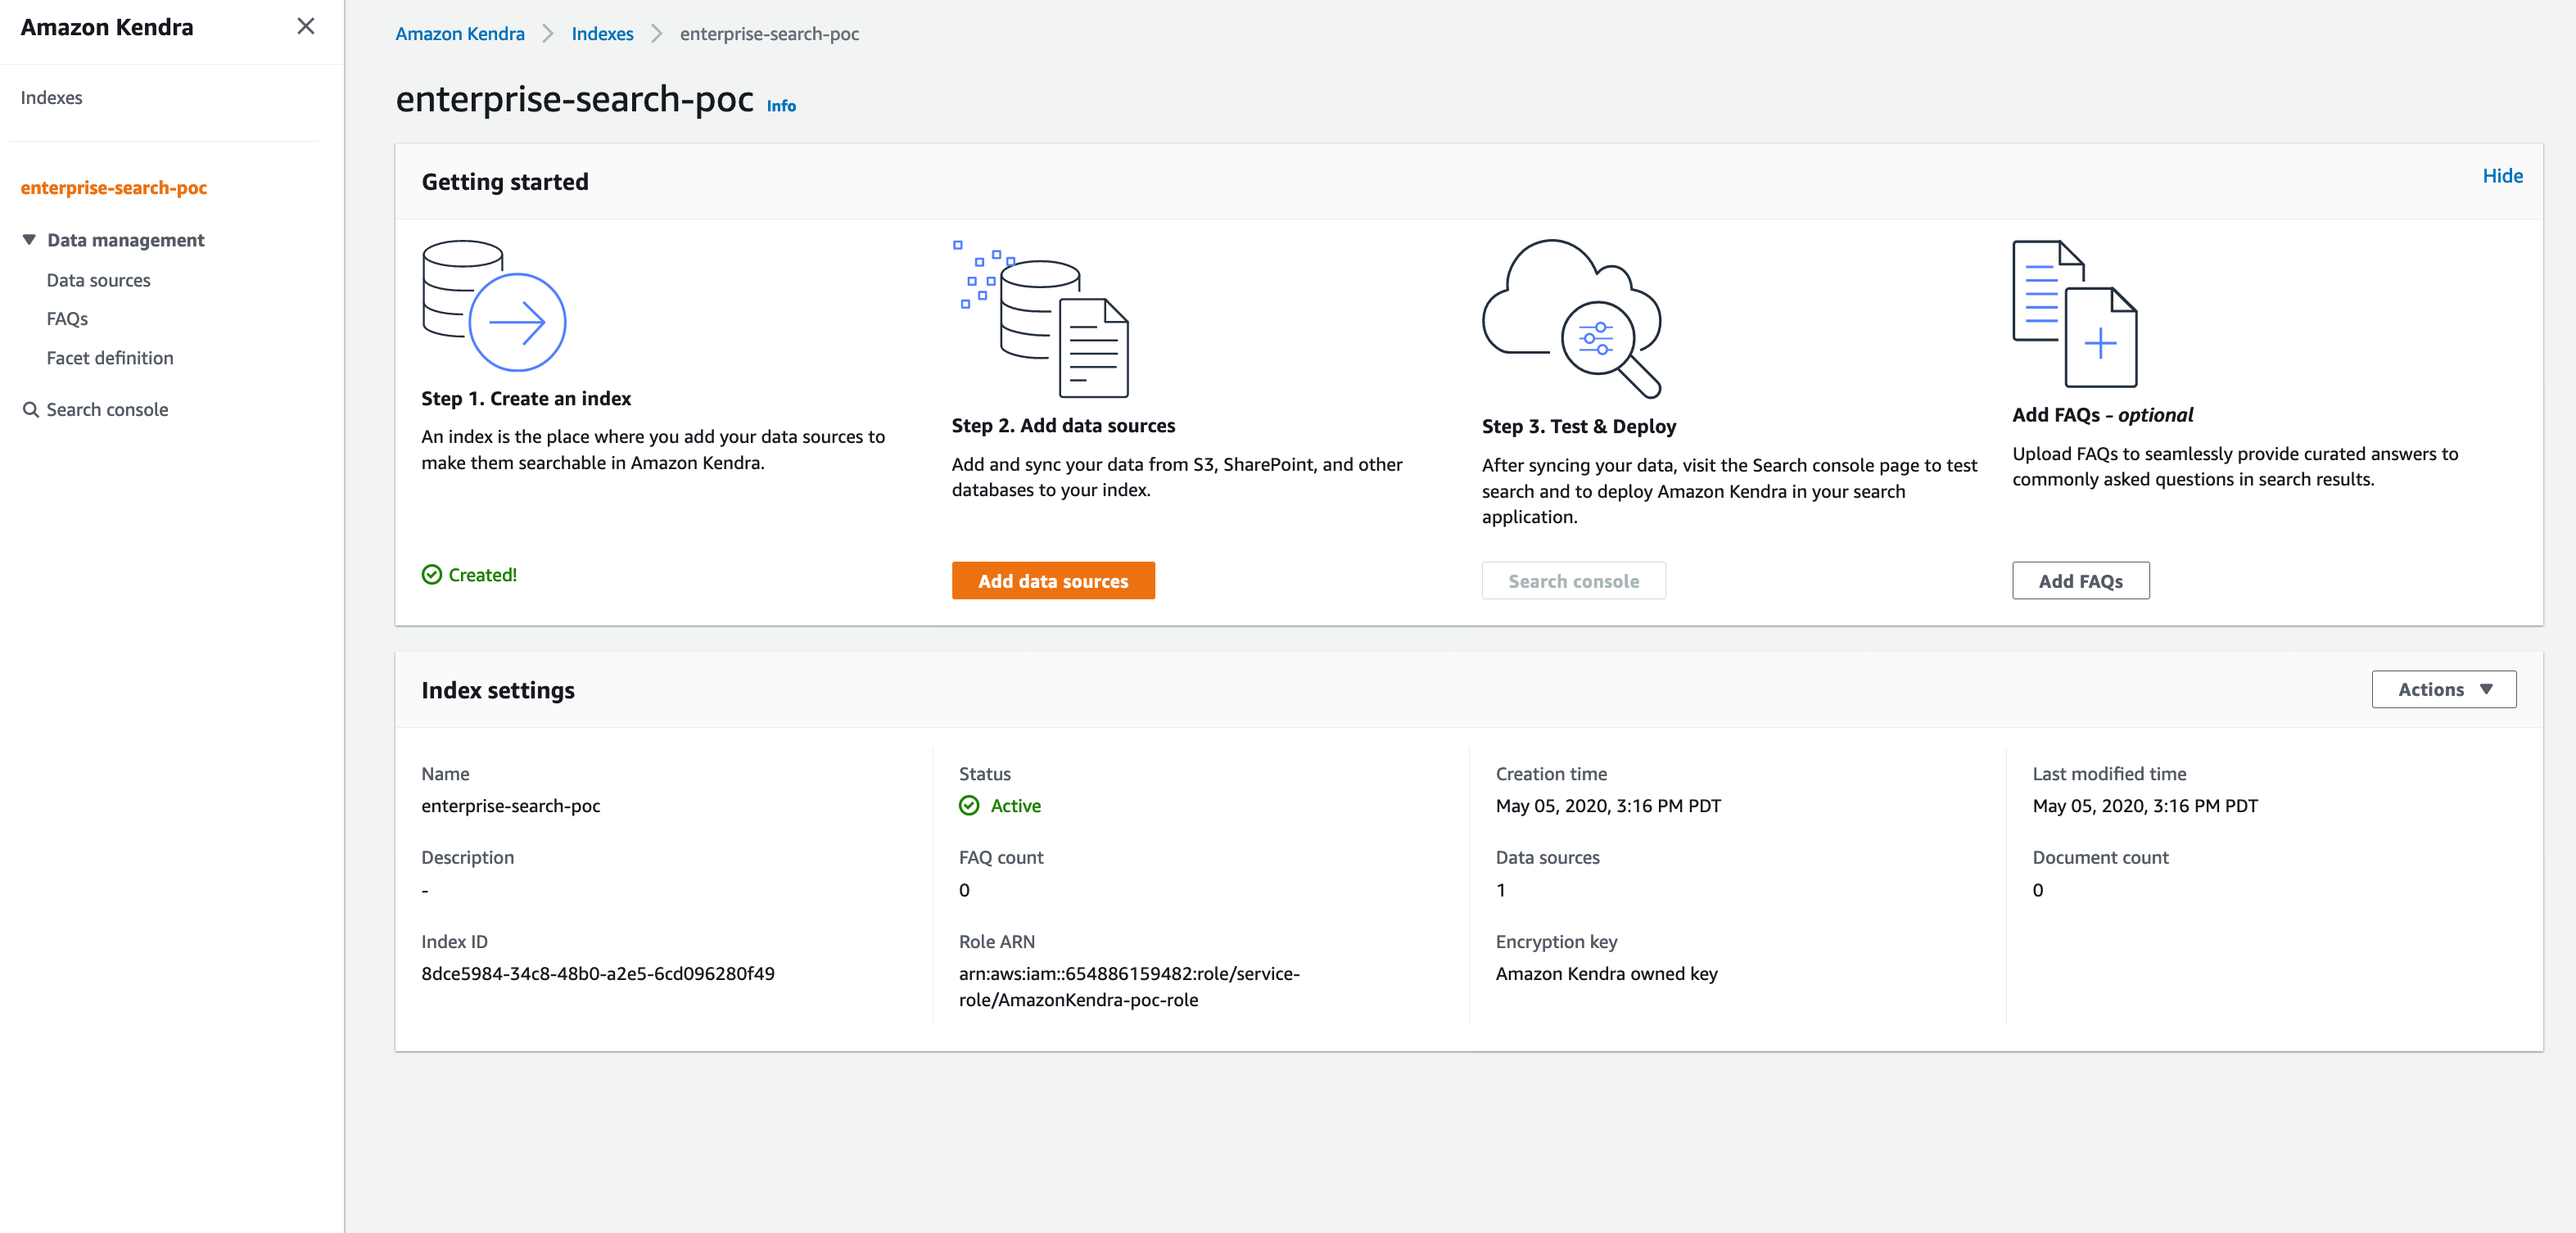
- Review the details of the data source as below. Please note and copy-paste the IAM role ARN to note pad. We will need to use it later.
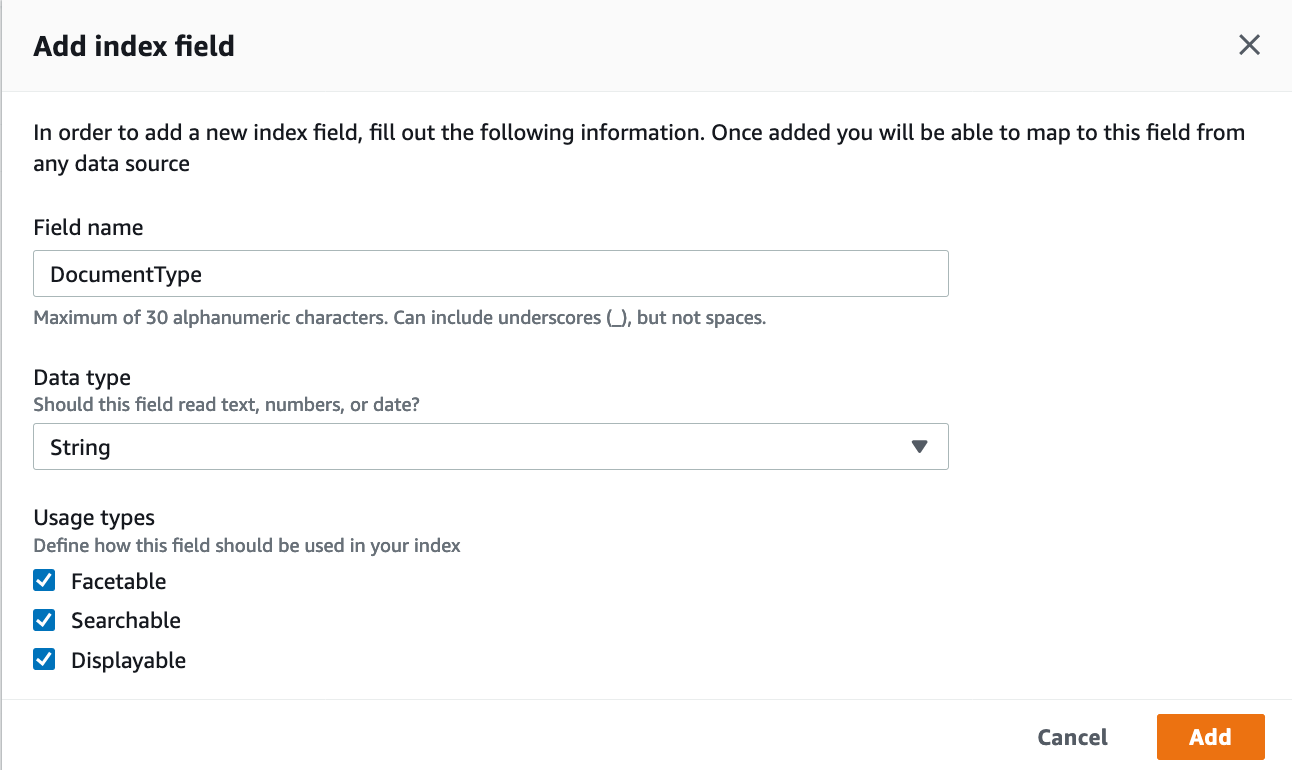
Create custom attribute
We will create a custom attribute called DocumentType denoting the type of ingested document.
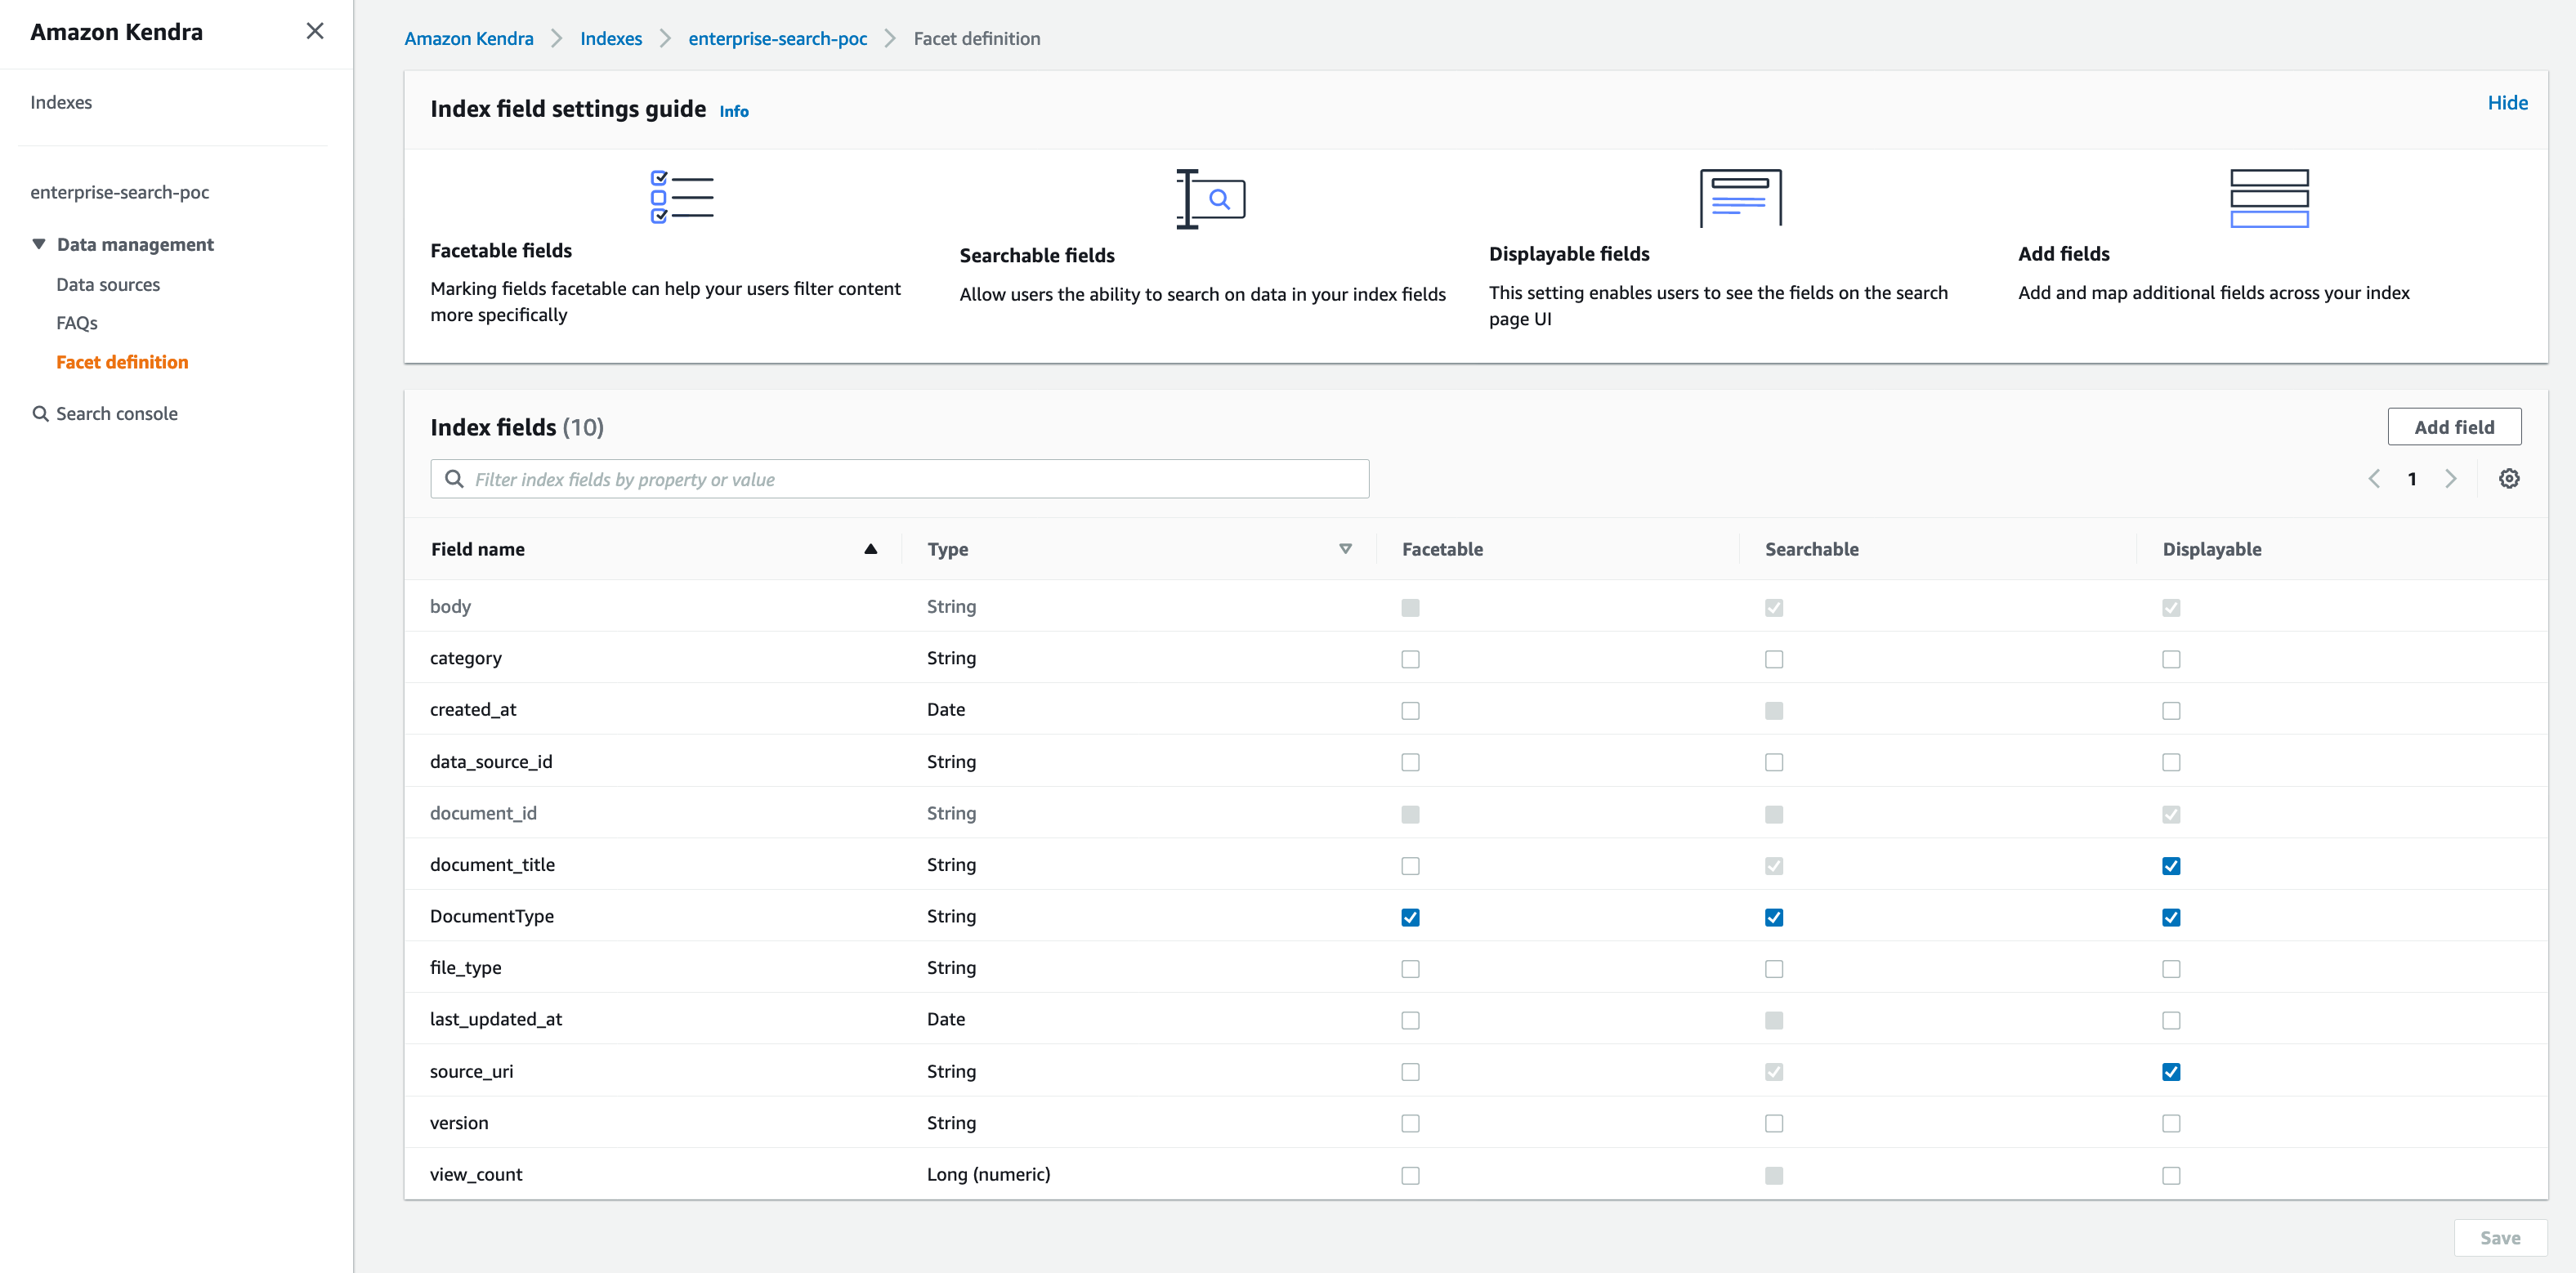
- In the AWS Management Console browse to Kendra, click on the index and then click on Facet definition
- Click on Add field. Give the Field name to be DocumentType, Data type as String and for Usage types check all the boxes for Facetable, Searchable, Sortable and Displayable as shown below. Click Add.
- Note the newly defined DocumentType in the list of Index fields
Congratulations! You have successfully configured the Kendra index and data source.